Sound Sensor Icon: Practical Guide to Selection and Implementation
Selecting the right Sound Sensor icon seems like a minor detail in interface design, yet it frequently becomes a friction point for users navigating audio-centric applications. Whether you are building a smart home dashboard, an industrial monitoring system, or a consumer mobile app, this specific symbol serves as the primary visual bridge between physical hardware and digital feedback. A well-chosen sound sensor graphic communicates functionality instantly, while a poor choice creates ambiguity that forces users to pause and guess. For designers, developers, and product managers, understanding the nuance of this simple element is essential for creating intuitive user experiences that feel professional and polished.
The Functional Role of Audio Detection Symbols
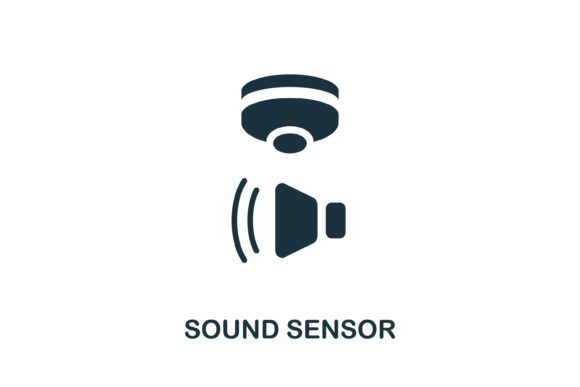
At its core, a sound sensor icon represents input rather than output. This distinction is where many projects stumble. Users universally recognize a speaker symbol as audio playback and a microphone as voice recording. However, a sound sensor implies environmental monitoring, decibel measurement, or acoustic triggering. When you integrate this asset into UI kits or infographics, it must visually differentiate itself from standard volume controls. The symbol needs to suggest analysis or detection, often through the inclusion of waveforms, signal bars, or stylized ear motifs combined with technical indicators.
Professionals across various sectors rely on these vector graphics to convey complex data simply. In educational software, the icon might represent a physics experiment on acoustics. In security apps, it indicates glass-break detection or noise-level alerts. For entrepreneurs marketing IoT devices, the icon acts as a feature highlight on packaging and landing pages. Because the use cases vary so widely, relying on a generic clip-art approach often fails to meet specific contextual needs. The asset must align with the broader visual language of your project while maintaining immediate semantic clarity.
Common Pitfalls in Visual Communication
One of the most frequent mistakes involves selecting icons that are too abstract or overly decorative. While creative flair has its place, functional UI elements prioritize recognition over artistic expression. If a user has to hover over a tooltip to understand that a squiggly line represents "ambient noise detection," the design has failed. Over-stylization can also cause rendering issues at small sizes. Intricate details that look beautiful in a large EPS preview often turn into muddy pixels when scaled down to 24px for a mobile navigation bar or status indicator.
Another significant oversight is neglecting file format versatility. Many creators download a single JPG version because it is convenient, only to realize later that they cannot change the color to match their brand guidelines or remove the background for a dark mode interface. Raster images lack the scalability required for modern responsive design. Using a non-vector source limits your ability to adapt the asset across different media, from high-resolution print infographics to crisp retina displays. This limitation often leads to inconsistent branding or the need to purchase replacement assets later, increasing both cost and project timeline.
Semantic confusion also plagues many implementations. Designers sometimes interchange sound sensor symbols with notification bells or alert triangles. While related, these are not synonymous. A bell implies a system-generated message, whereas a sound sensor implies real-time environmental feedback. Mixing these metaphors dilutes the user's mental model of how the application works. Consistency in symbolism helps users build accurate expectations about what the system is doing versus what the system is telling them.
Evaluating Quality Before Download
To avoid these usability traps, establish a checklist before integrating any audio detection graphic into your workflow. First, verify the technical specifications. Ensure the package includes an editable EPS file alongside standard raster formats like JPG or PNG. The vector file should have clean anchor points and organized layers, making it easy to modify stroke weights or colors without breaking the shape. Poorly constructed vectors can be frustrating to edit and may result in jagged edges when exported.
Next, test the icon at multiple scales. View it at 16px, 32px, 64px, and full size. Does the meaning remain clear at the smallest dimension? Are the lines distinct enough to prevent visual merging? If the icon relies on color alone to convey meaning, it will fail accessibility standards. Always ensure the shape itself carries the semantic weight, using color only as a secondary reinforcement.
- Check Stroke Consistency: Ensure the line weight matches other icons in your existing set to maintain visual harmony.
- Verify Metaphor Clarity: Confirm the symbol clearly suggests "sensing" or "measuring" rather than just "listening" or "playing."
- Assess Editability: Open the EPS file to confirm paths are not flattened or rasterized within the vector container.
- Review Licensing: Understand usage rights for commercial apps versus personal projects to avoid legal complications.
Strategic Application in UX and Infographics
Beyond avoiding errors, effective use of the Sound Sensor icon enhances overall communication. In infographic design, this symbol serves as an excellent anchor for data visualization. When presenting statistics about noise pollution or acoustic engineering, pairing the icon with charts creates an immediate cognitive link between the data and its source. The vector nature allows you to extract individual components, such as isolating just the waveform or the sensor housing, to create custom composite illustrations that support your narrative.
In software interfaces, consider the state variations of the icon. A static image rarely tells the whole story. You may need active, inactive, alert, and error states. Having access to the source EPS file enables you to generate these variants systematically rather than hunting for mismatched assets. For example, an active sensor might display solid waves, while a muted or disconnected sensor could show broken lines or reduced opacity. This systematic approach ensures that every state feels like part of a cohesive family, reinforcing trust in the product's quality.
For marketers and content creators, the presentation of this icon matters as much as its function. When showcasing features on a website, avoid placing the icon in isolation. Contextualize it with brief labels or micro-copy. Instead of just showing the symbol next to a toggle switch, pair it with text like "Ambient Monitoring" or "Noise Threshold." This redundancy supports users who may be unfamiliar with the specific iconography while keeping the interface scannable for experts. It bridges the gap between technical accuracy and user-friendly design.
Making the Right Asset Choice
Ultimately, the decision to use a specific sound sensor graphic should be driven by clarity and adaptability. Beginners often focus on finding something that looks "cool," while experienced professionals prioritize assets that solve communication problems efficiently. Investing time in selecting a high-quality, editable vector resource pays dividends throughout the product lifecycle. It reduces revision cycles, ensures cross-platform consistency, and provides the flexibility needed as requirements evolve.
Whether you are a freelancer delivering a client project or an educator creating course materials, treat this simple element with the same rigor as your typography or color palette. A thoughtful approach to icon selection signals attention to detail and respect for the end-user's experience. By avoiding common pitfalls regarding semantics, scalability, and editability, you transform a basic graphical asset into a powerful tool for effective digital communication. The goal is always seamless interaction, where the technology fades into the background and the user focuses entirely on the task at hand.